You know how, some nights, you just want to enjoy a new movie or catch up on your favorite series, but you can’t help but curse out loud because (1) you can’t hear a single word from the TV, (2) you can’t use your earphones because you’re not the only one watching, and (3) your copy doesn’t come with subtitles.
There are just so many things that can ruin your perfect movie night. You live near an airport; noisy motorcycles keep zipping past your street; the rain is too heavy that you can hear it from inside; your tone-deaf neighbor is having another videoke concert.
Luckily for you, soundproofing your room doesn’t have to mean a renovation. Here’s a neat little DIY project you can do to get rid of all the nasty noises from outside, all while adding style to your room—Decorative Sound-Absorbing Panels.

STEP 1: Get Creative!
The first thing you’ll have to do is think about what you want on your canvas. If you’re a talented artist, go ahead and paint an original piece. You can also paint some inspiring quotes or create patterns using sponges in different shapes.
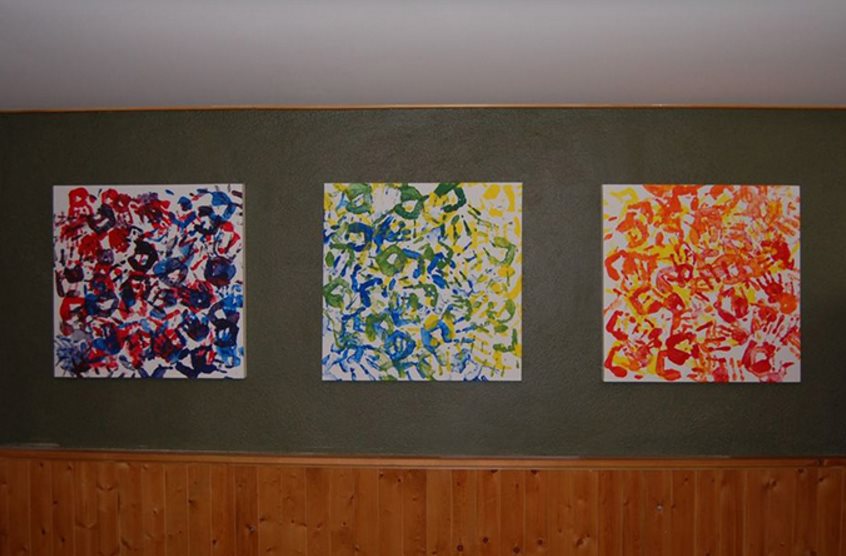
If you want to replicate the design here, it’s actually pretty simple. Call in some volunteers; your kids will surely love to help. Let them dip their hands onto some washable acrylic, then just let them have at it. Wait for the paint to dry.

(An alternative: A lot of studios can also do photo printing on canvas, in case you want to decorate your walls with some really cool images.)
STEP 2: Fill ‘Em Up with Foam
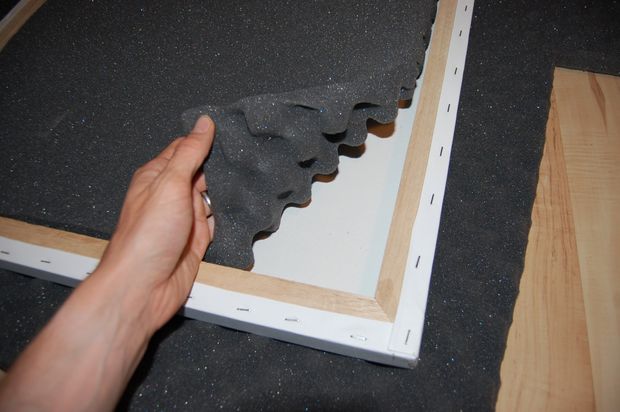
If you bought a sheet of eggcrate foam that fits perfectly into the back of your canvas, you can go with that. However, it can be much wiser to just buy a whole roll of the foam. They’re pretty cheap. You can just buy a large sheet and cut them up to fit your canvas, especially if you’re planning to make more than one sound-absorbing panel.
Flip your painted canvas over and fit your foam inside the space. Make sure that the foam fits snugly into the canvas but doesn’t bulge out. Place the foam so that the bumpy side is towards the canvas.

(An alternative: If you’ve got a bit more on your budget, you can also use fiberglass panels that are just as thick and use them in place of the eggcrate foam. Fiberglass panels absorb more bass so that the sound doesn’t come off as too muddy or boomy even when you play music in high volume.)
STEP 3. Cover It Up
Place a large piece of paper on the back of the panel so that it’s covered completely with the paper but doesn’t hang over the edges. Staple at the edges with your staple gun.

STEP 4. Install the Hangers
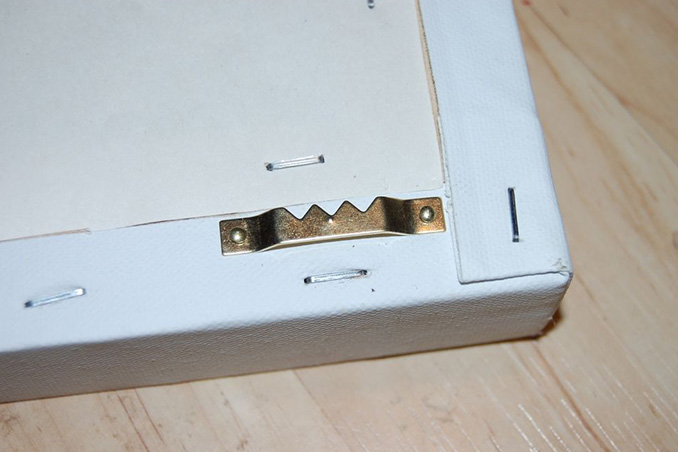
In case the frame of your canvas doesn’t come with hangers, install the picture hangers onto them, preferably on the two top corners. The ones used here are those inexpensive brass hangers attached with small finishing nails.
Your panel is now ready to mount!
STEP 5. Mount the Panels
Carefully plan and measure how high and where exactly you want to hang your panels. You can use pencil or tape to mark the locations for where you want to drill holes onto the wall for the nails or screws.

All that’s left for you to do is to hang the panels on the screws. Now, you can enjoy your movies better, your room has earned some new accent pieces, plus your kids (if they helped you decorate the panels) will have something to boast about when their friends come over for a viewing party!

**Photos sourced from Instructables.com
